Workflow: How to Create Roughness / Glossiness Map For Our Character
In this article, I'm gonna go over my workflow on how I create a quick but good-looking Glossiness/Roughness Map for my characters. It's a solid starting point to build on.
OK, so you have your character sculpt ready for the next step. Most of the maps needed for real time renders or rendering engines like Renderman, VRay, Arnold, etc. are straight forward to create. I mean their processes are clear enough. However, creating roughness/glossiness map is probably not one of them for most artists. There are several ways of creating it, but first, let me quickly go over the little, confusing difference between the glossiness map and the roughness map.
Glossiness Map VS. Roughness Map
It’s really simple, one is the inverted version of the other. Why don’t we just stick to one of them? Better ask the engineers working behind the rendering engines! So, for example if you create glossiness map, well, congrats, you have the other one as well. All it takes is to open it Photoshop, and press Ctrl+I. That’s it.
It’s the target engine that determines which one to use. For example, the Unreal Engine 4 (UE4), uses Roughness as its standard workflow, and Marmoset Toolbag, uses Glossiness as its standard.
In this article, I’m gonna show you a way to quickly create a good looking base for our glossiness map, then in the end, I’ll invert it to create roughness map as well.
The Concept Behind This Workflow
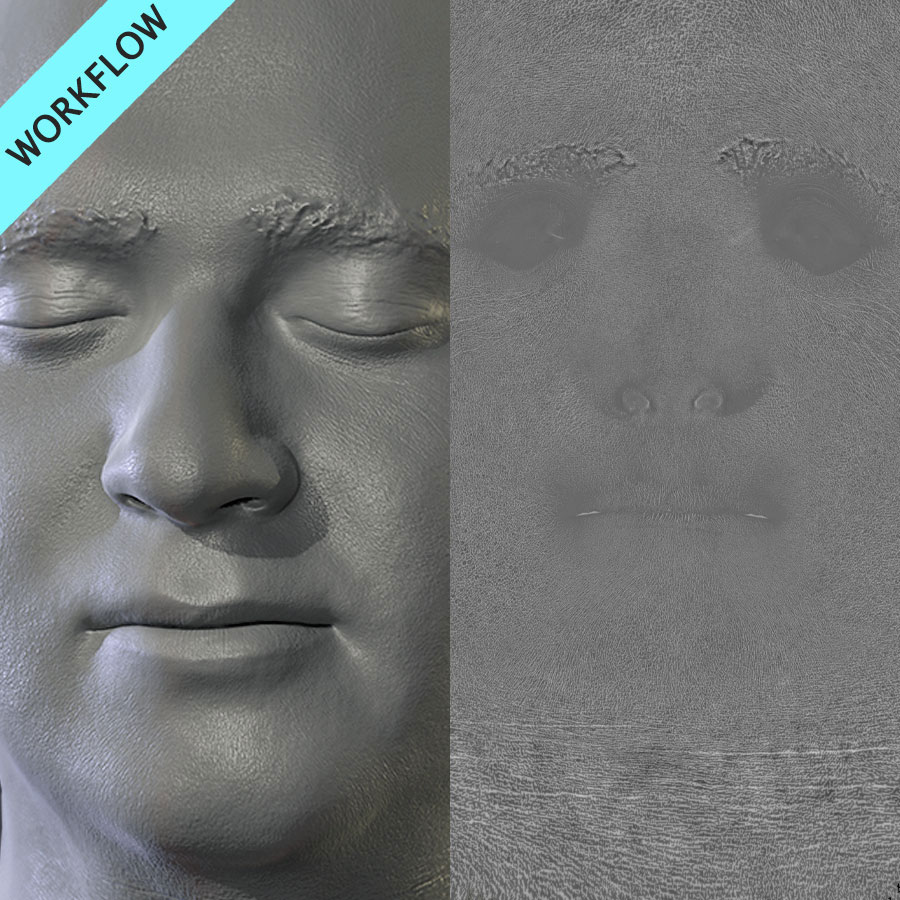
Basically, all I do is to combine a specific version of the displacement map of my character, and its cavity map. That’s about it.
The displacement map is used to cover the general areas of the head, and the cavity map is used to bring out those little sculpting details like skin pores, and helps to pop them out.
So, enough talking, let’s do this.
Detailed Steps of Creating Glossiness Map
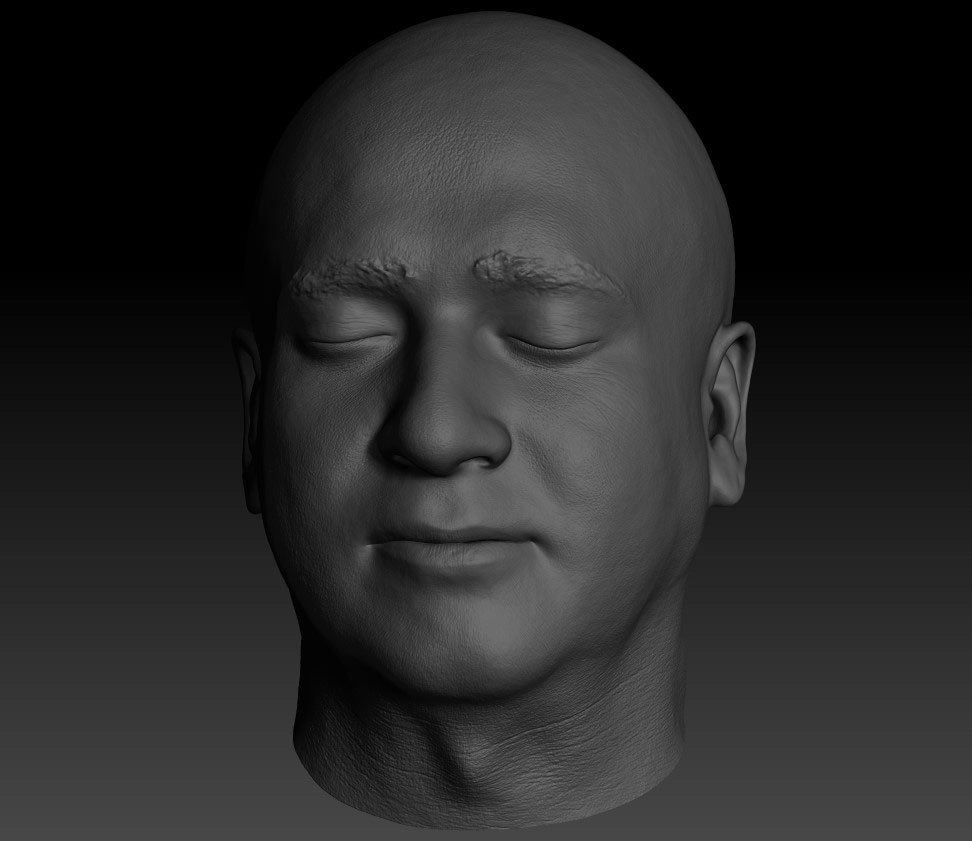
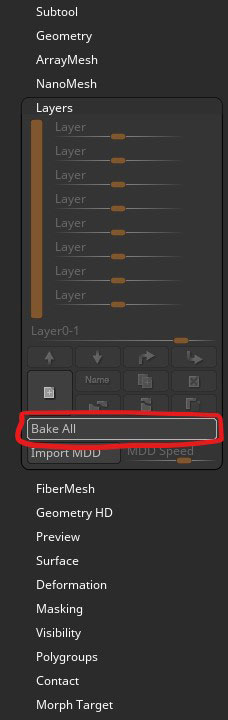
First, make sure you have no sculpting layers by baking all of them (if you have any). If you don’t do this step, probably you’re gonna have trouble painting your maps on your character.
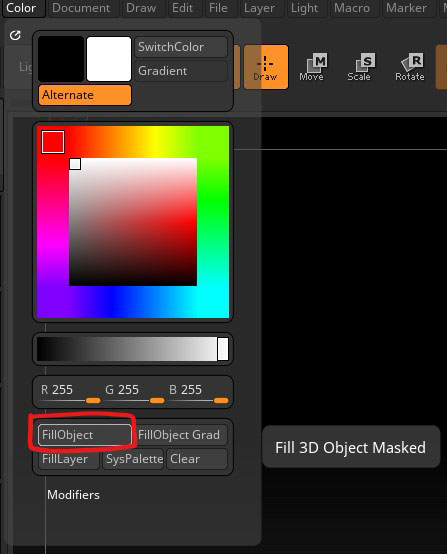
Then, fill your model with white color.
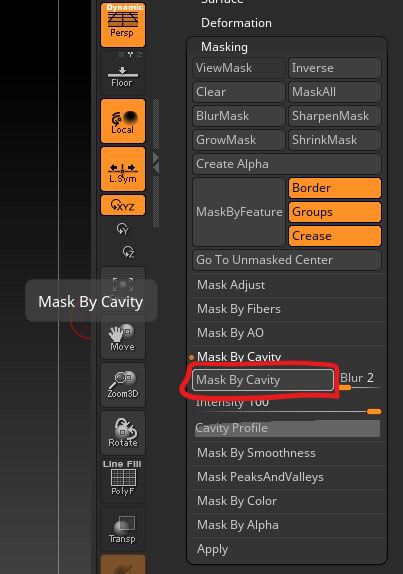
First, we’re gonna create the Cavity Map. For that, click on Mask By Cavity in Masking menu. Then, Ctrl+Click on an empty space to invert the mask.
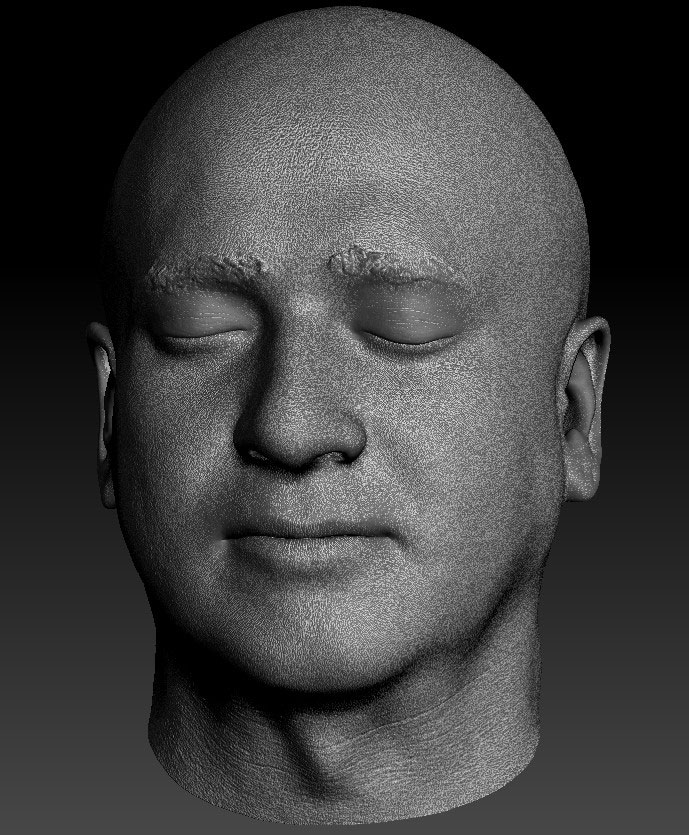
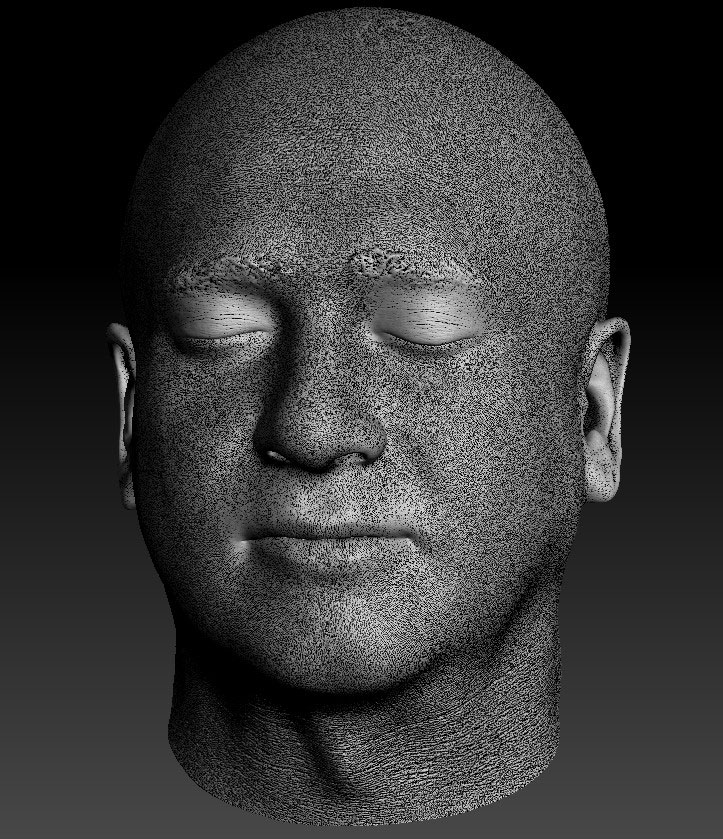
You should have something that looks like the image below. If you don’t get a similar result (though it really depends on your model), try to play with the Cavity Map settings. Most important one of them being the Cavity Profile. And then try again.
Now, all we need to do, is to fill the selected area in black.
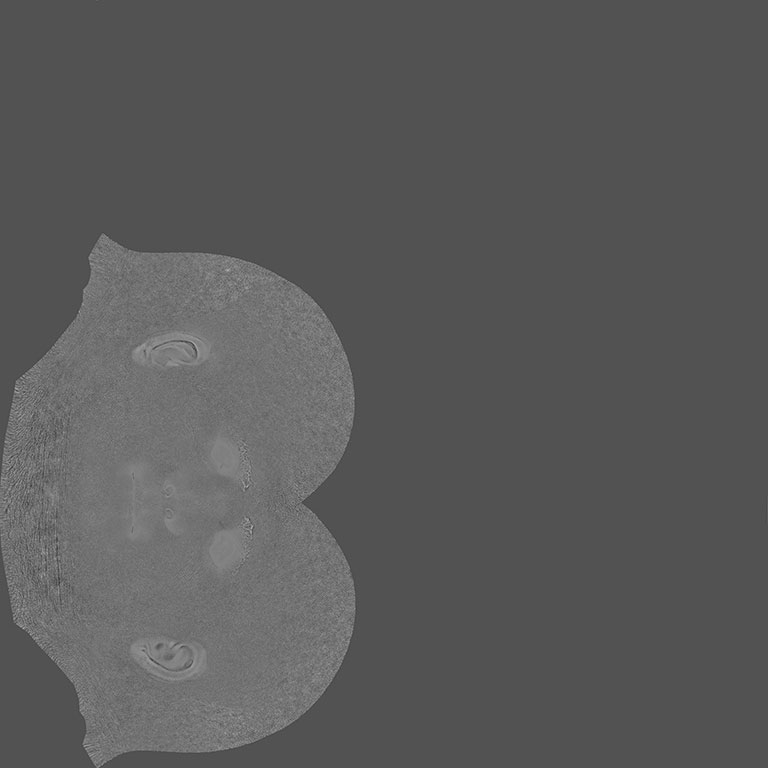
This is how the Cavity Map should look like. Later, other than what we do with it here, it will have an important role to play when it comes to rendering, whether real-time, or pre-processed.
Now, it’s time to create it. But before that, remember that you should already have your final UV Layout. Also, in ZBrush, check you UV Map resolution and make it the size that you want. I usually go for the maximum 8K.
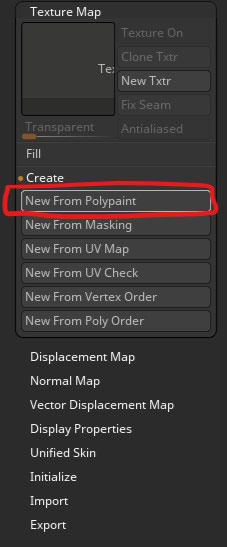
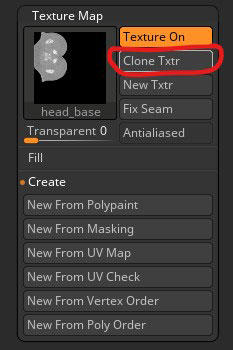
OK, everything’s set. Click on New From Polypaint under the Texture Map menu.
Then, you need to clone your texture to be able to export it. Click on Clone Txtr to clone it.
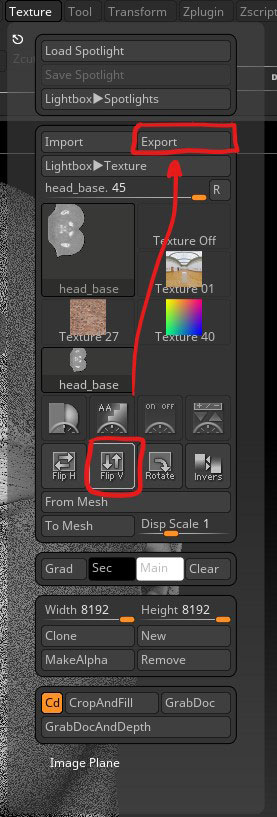
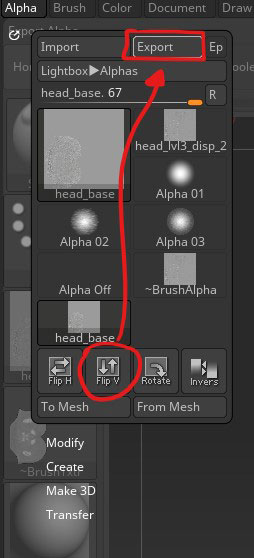
Before exporting, you need to flip the texture vertically. Because as you know, the UV workflow in ZBrush is inverted vertically in comparison to what you have in other 3D packages like Maya, 3Ds Max and Blender.
Click on Export, and choose the format that you want. I’ll stick with .PSD for now.
So, the Cavity Map is done. Now it’s time for the other map that we need; which is a mid-value displacement map.
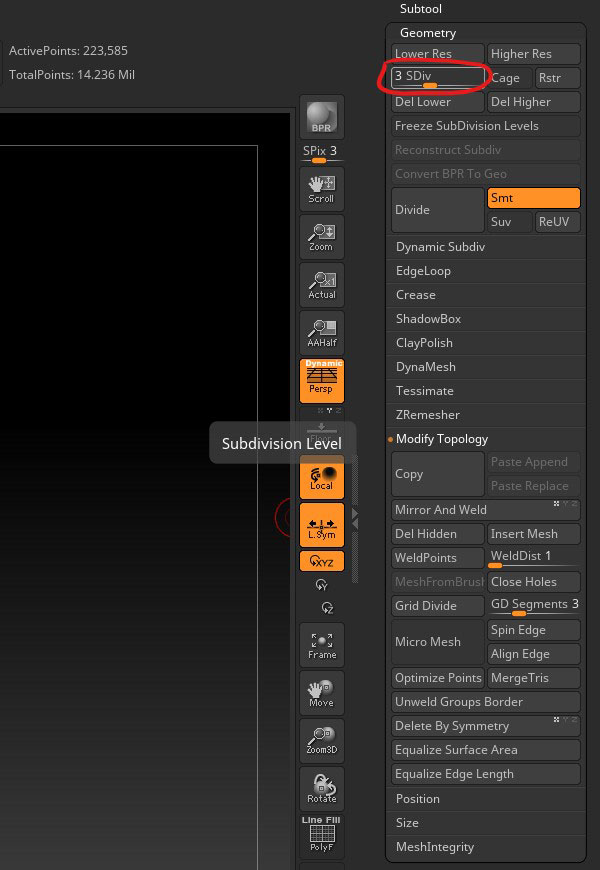
Alright. Let me give you an idea about it all. The whole idea here is, to put your model’s SDiv near half of what you have, and create a Displacement Map from there. My model has 6 subdivision levels and 14.2 million polygons. So I’m gonna put it on half-way through the subdivisions, like SDiv 3 and create the Displacement Map. This way, I prevent having too much (almost noisy details) in my Glossiness Map and cover the bigger shapes of the head.
I hope I’m clear, but don’t worry if it’s not the case, it will make sense in the end.
So, After putting the SDiv level of your model to half, click on Create DispMap under the Displacement Map menu.
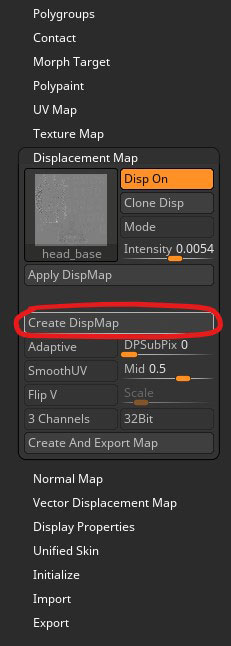
Now, like before, we need to clone it. Click on Clone Disp.
Before exporting Displacement Map, flip it vertically and then click on Export and save it.
This is where the magic happens! In Photoshop! Yup, it’s time to combine the two.
First, fill the Background layer with %60 grey. Then, import the Displacement Map on top of it, and put the opacity to something like %70. Next, import the Cavity Map and put the opacity to something like %25. Then add a Levels adjustment specifically on top of it and input something around 1.50 on the midtone section to make it a bit lighter in midtone areas.
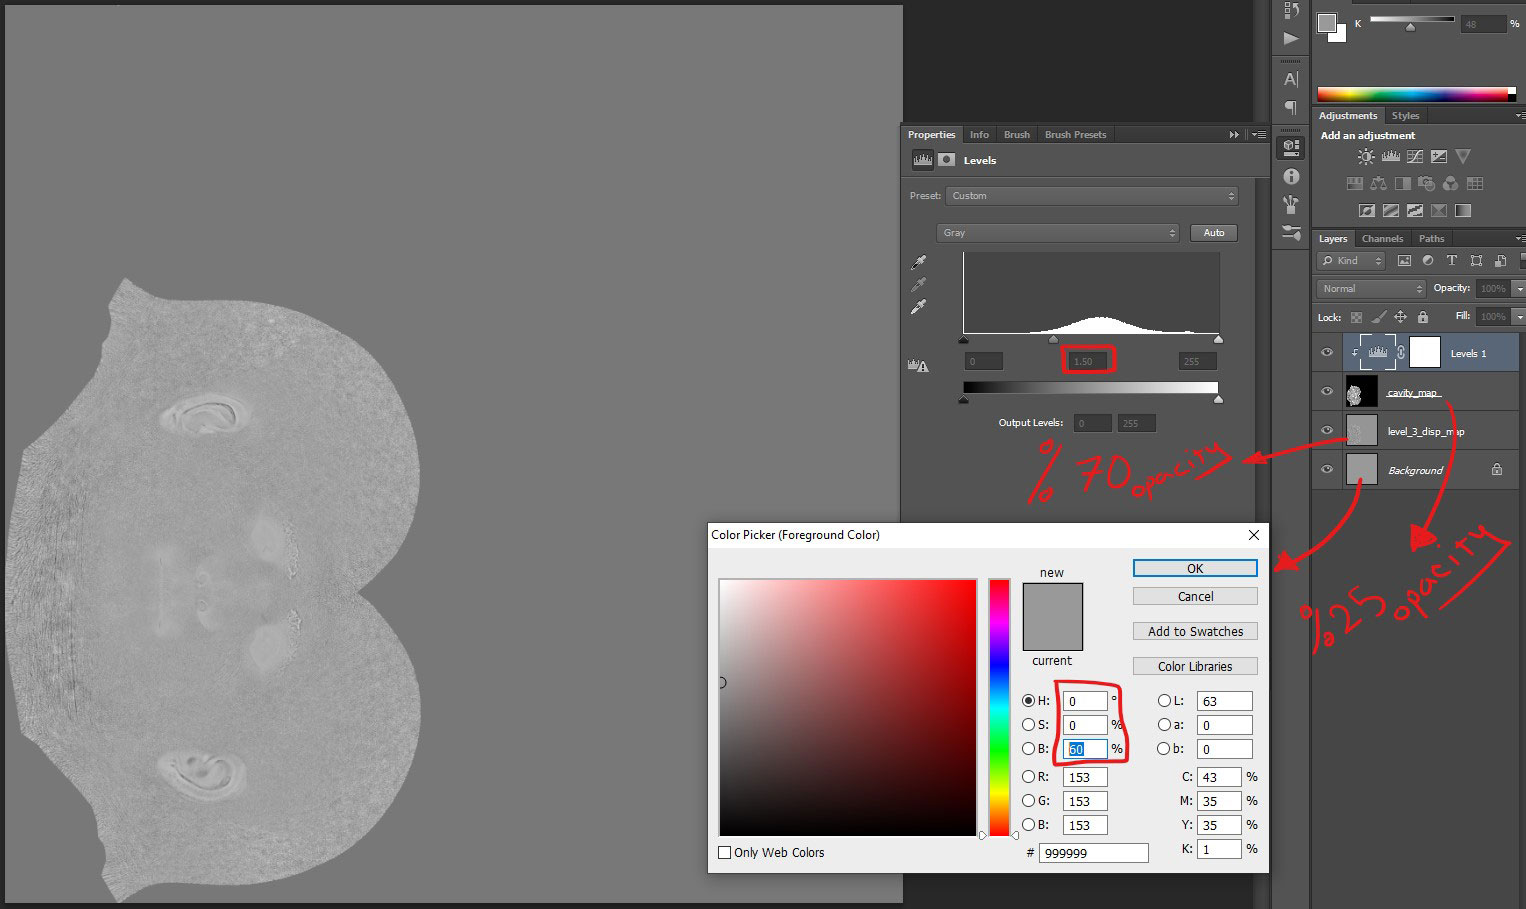
After that, I usually group everything except the Background layer and darken it a bit more using a Brightness/Contrast adjustment layer. It’s usually enough to put the brightness value to somewhere around -40.

That’s all. Now you have your Glossiness Map ready to put to test. This is obviously a back-and-forth process, the numbers I mentioned are based on my experience and my workflow. You could always change some stuff in Photoshop and then test it again to achieve what you really like. This method is usually good as a starting point; meaning for example if your character have scars or is sweaty, you could start creating a basic Glossiness Map using the method that I talked about in this article, and then take it to a PBR painting program like Substance Painter, and paint the desired Glossiness on top of the current one as the need arises.
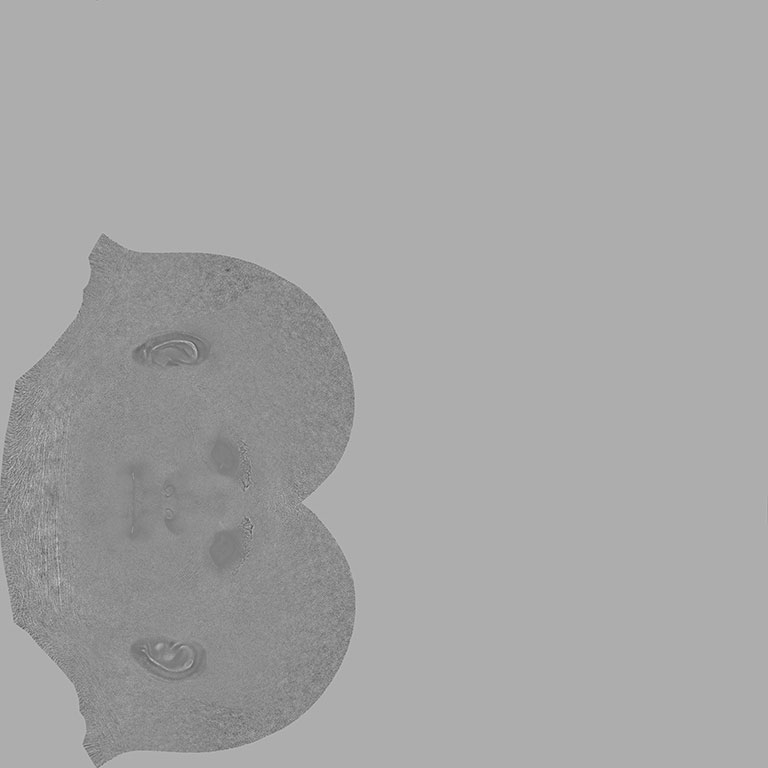
This is how my final composited Glossiness Map looks like. It’s also worth mentioning that the empty space in the UV layout, is for the hands, which I did not cover in this article.
As I mentioned earlier, to get the Roughness Map, it’s only a matter of inverting the colors of the Glossiness Map.
(Flatten the image in Photoshop, and then press Ctrl+I to invert it.)
Here’s the final real-time render I got in Marmoset Toolbag 3.04.
Thanks for reading this article everyone. I hope you got away with something out of all this.
Feel free to let me know your feedback and ask me your questions in the comments.
Cheers!