Quick Tips: Making of the Argonian Chest Scales
Here I'm gonna go over how I created the chest scales for this character in ZBrush.
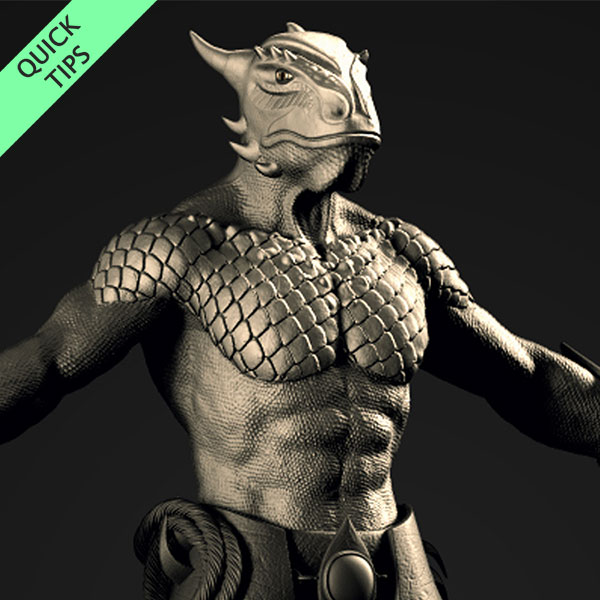
Making of the Argonian: Chest Scales
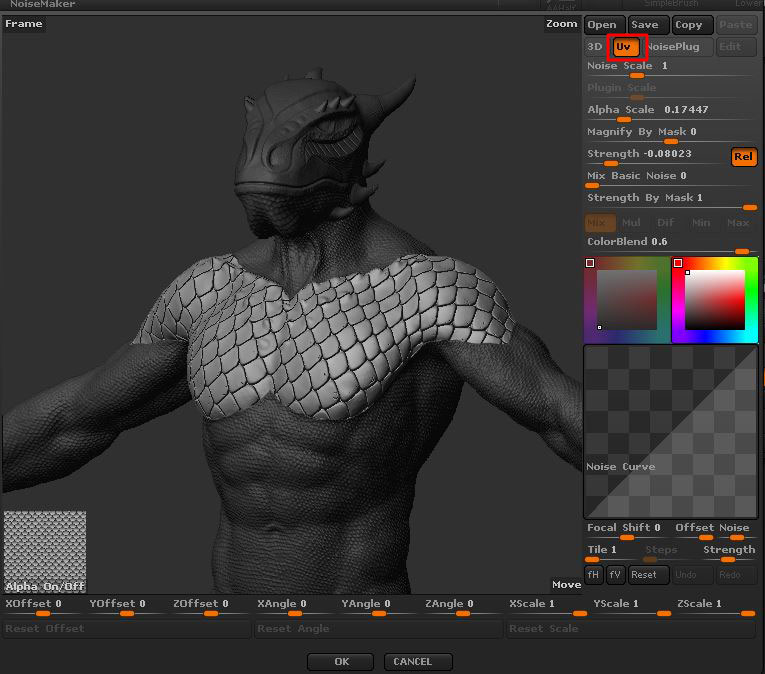
To create the scales on the chest of this guy, I used ZBrush’s Noise maker combined with an alpha. I scattered the alpha pattern using UVs. So the mesh had to be retopologized and UVd properly before getting into such details.
Steps
Mask the area you want to apply the scales, and invert it.
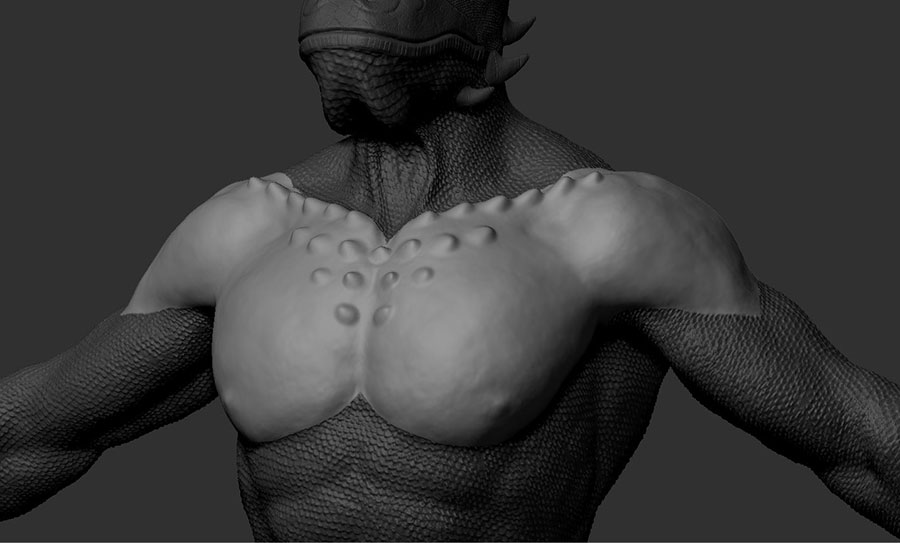
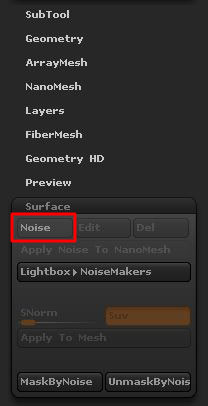
Go to Tool>Surface>Noise.
Click on Alpha On/Off and open your alpha image.
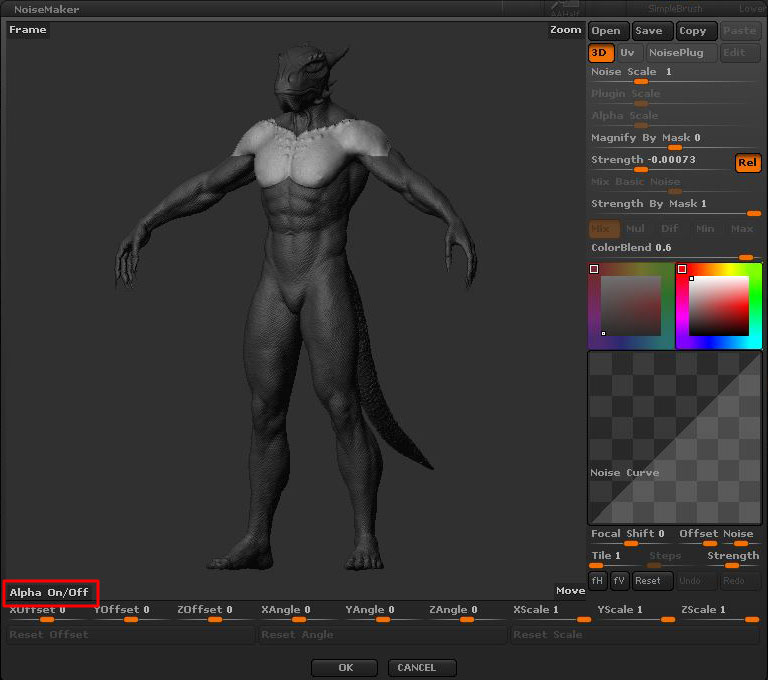
Click on Uv to scatter alpha image using UVs.
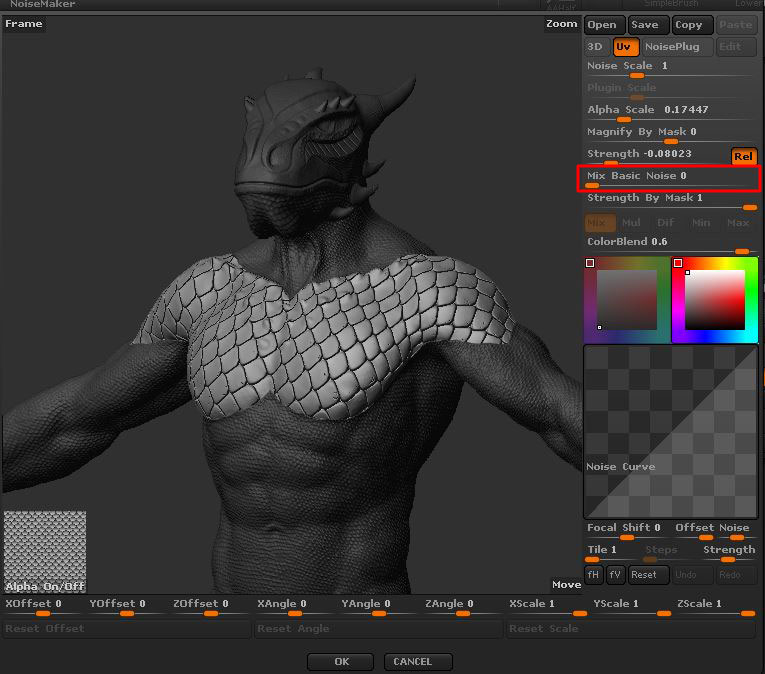
Zero out the Mix Basic Noise slider to avoid the funkiness of the basic noise.
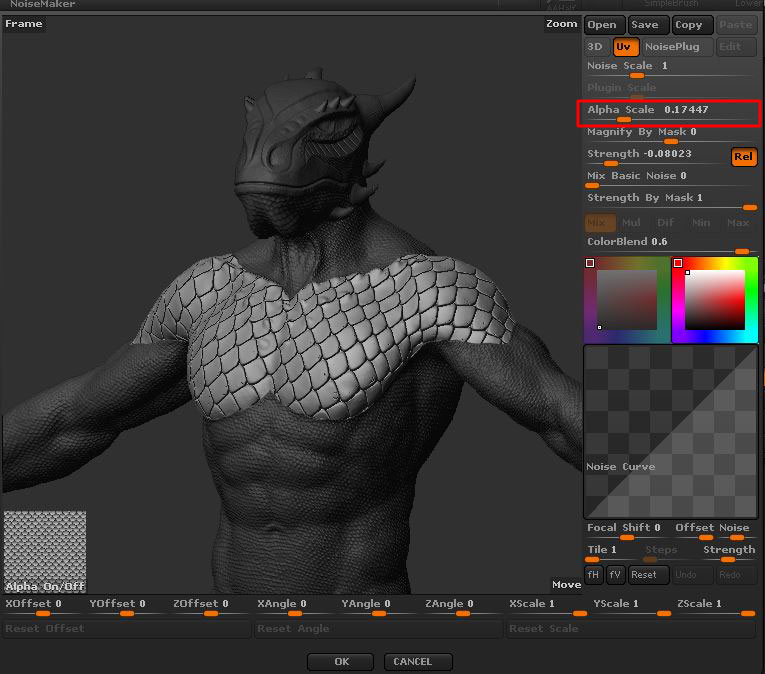
Play around with Alpha Scale to adjust the size of scattered alpha.
Adjust the depth of the alpha, by using the Strength slider.

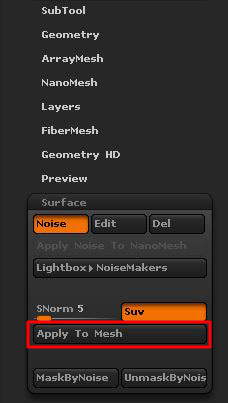
Click OK, adjust the mask if you need to, and then click on Apply To Mesh.
General Noise Maker Tips
- After clicking Apply To Mesh, you may lose some details shown in preview, because your mesh has a relatively low resolution. So make sure you have your mesh divided enough times.
- If it’s possible for you, try to apply such details on a separate layer. The reason for doing so, is to have the flexibility to change it later, if it doesn’t work out with other stuff you add later on, or professionally, if the art director asks you to change it later in the pipeline.
- On the other hand, adding a sculpt layer on top of what you had before, makes the file size larger. As far as I tried, ZBrush (Version 4R7) can’t open the .zpr or .ztl files larger than 2 GBs. So always have an eye on your file size.
- To reduce the file size a bit, after you applied the noise to the mesh, and you were happy with the result, click on Del in Tool>Surface>Noise>Del. Just make sure you don’t need to get back to it later, and the result is final.
I Hope this quick walkthrough helps you with creating your artworks. Cheers!