Workflow: Controlling Stitching / Sewing Lines
In this article I'm gonna give you an overview of my sewing workflow in ZBrush and Substance Painter, in which you have full control over them when it comes to texturing.

Having control over the sewing lines you sculpt in your character’s clothing, is crucial; because when it comes to texturing part of the pipeline, it will be important to be able to deal with them separate from the main clothing. By using this workflow, you can assign different color, material, dirt, etc. to the sewing lines separately, in Substance Painter.
The Concept
The whole idea, is simply to create a mask while sculpting in ZBrush. Then, when you import your model to Substance Painter, it’s just a matter of applying the created mask to the desired material. And BOOM! You’re in the driving seat!
Notes Before Starting
- Your mesh has to have proper UVs.
- We create the mask while sculpting, so if you already have your sculpt ready, this is not gonna work, naturally.
- If you needed to change/optimize the mesh’s UVs after doing the sculpture, there’s nothing to worry about. The mask will be projected to your new mesh along with the sculpting details.
The Workflow
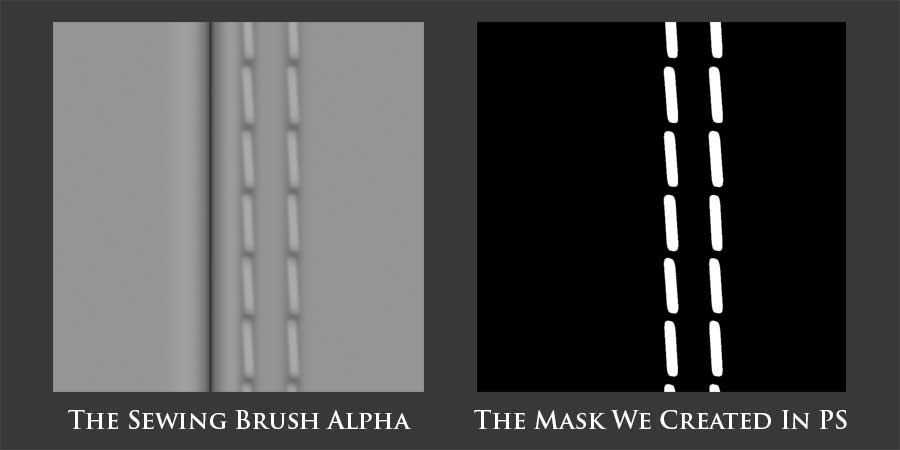
Before doing any sort of sewing line sculpting, bring the alpha of your brush[es] to Photoshop, and create a simple mask by painting white only on the sewing lines and leaving everything else black.
An example of creating the right mask for the sewing brush[es]:
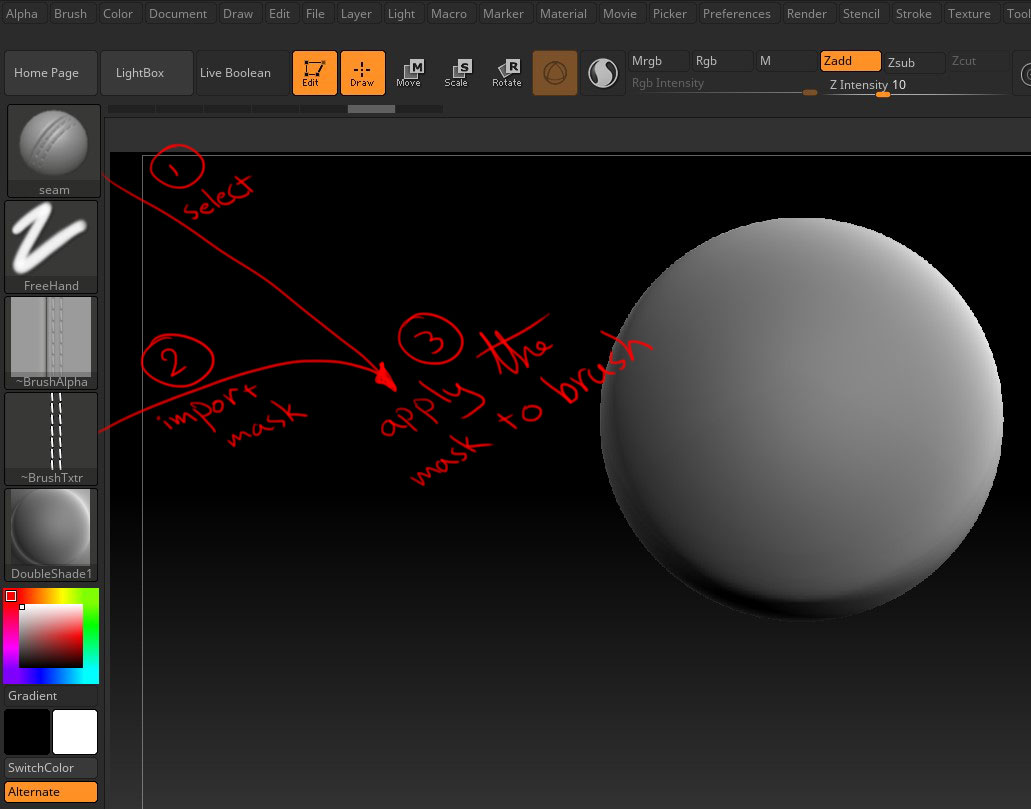
Then import the created mask to the texture section of ZBrush and apply it to the texture of your brush.
Then fill your mesh with black (pick black color, then go to Color -> FillObject, with RGB ON on any brush), and turn on the RGB of your sewing brush, and sculpt while a white color is chosen. This way, when applying the sewing lines to the mesh, the white color will automatically be applied right on top of the sewing lines. This will ultimately be our mask that we’re gonna export to Substance Painter.
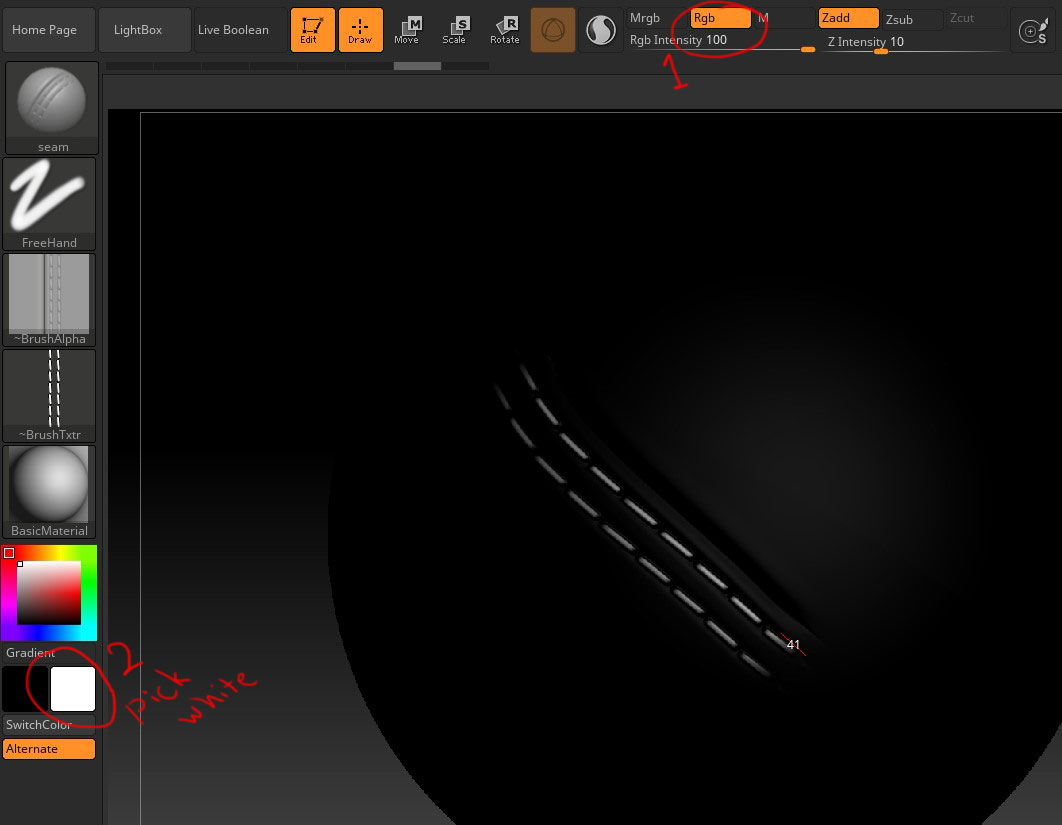
If you have trouble seeing your sculpting process, while in black, just click on the little “brush” button under the Subtool menu, beside the thumbnail of your mesh, to turn polypaint preview off. Now, you don’t see the white being painted, but don’t worry, it’s painting as long as you keep your RGB button ON while using your brush. You can click on that little “brush” button again, to make sure it’s painting.
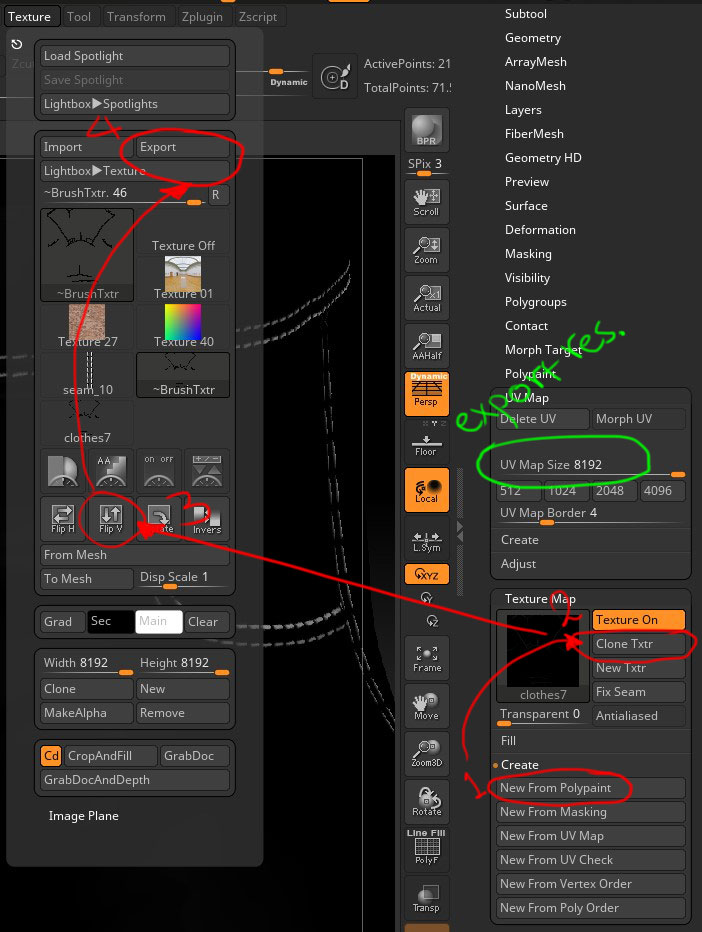
When you finished sculpting, it’s time to export the mask. Before that, select your desired UV resolution under the UV Map in Tool palette. Go with maximum to have more control later. To export the map, click on New From Polypaint under the Create sub-menu under the Texture Map menu in Tool palette. Then click on Clone Txtr. After that, click on Flip V under the Texture palette and then export. The exported image is the one we use in Substance Painter.
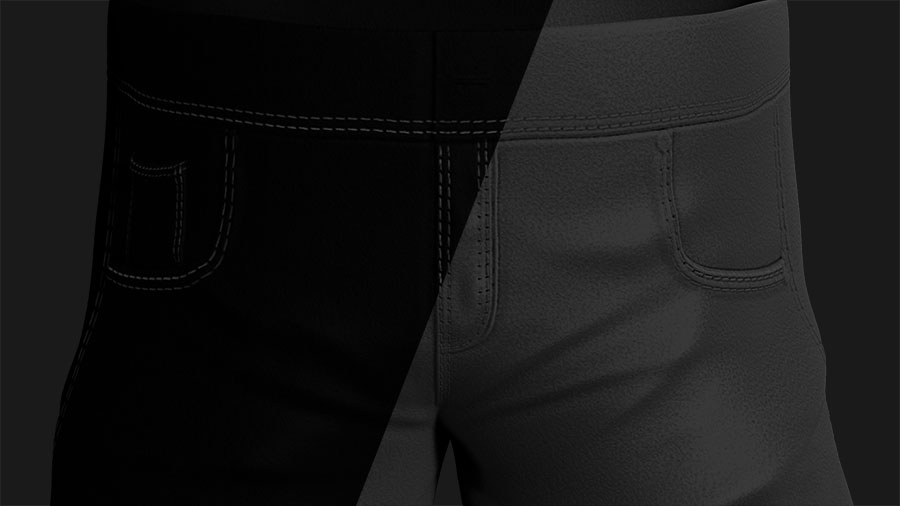
Import the mesh and the exported map from ZBrush into Substance Painter. Add the material you want to use for the sewing lines, then right click on the assigned material, and click on “Add bitmap mask,” then select the imported mask. That’t it, now the material only works on your sewing lines.
Conclusion
I like this workflow because it’s fast and doesn’t necessarily need extra UDIM tiles.
Also, this showcased workflow, could be used for any sorts of similar things, like zippers; then you can assign metal material to that section in Substance Painter.
That’s it everyone. Thanks for reading. I hope you got something useful out of this article. Let me hear what you have to say. Getting feedback is what gets me going faster.
Cheers!