Tips and Tricks: How To Use Maya Transfer Attributes Smartly
In this article, I'm gonna explain how to get the most out of Maya's Transfer Attributes as a Character Artist, and I'll also show you guys some hopefully useful examples to demonstrate a variety of usages of TA.
Maya’s Transfer Attributes function is probably something you should reconsider when it comes to using it your workflow. Because it’s awesome, and sadly often underestimated!
So today I’m gonna try to show you guys some examples of how we can use this function to save ourselves some precious time and also the variety of the things we could do with Transfer Attributes. Hopefully it helps you along with your projects.
How Maya Transfer Attributes Works
Much like other Maya functions, Transfer Attributes needs a target, and a source geometry. First, you have to select the source geometry, and then the target to which the transfer will be applied.
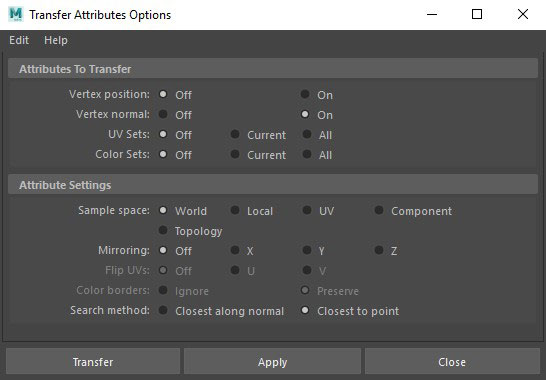
You can find Transfer Attributes in Modeling section under Mesh>Transfer Attributes. After you made your geometry selection click on the the Transfer Attributes options to see the window below:
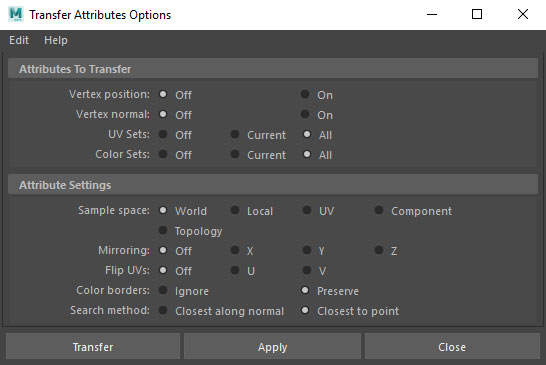 the default settings
Think of the first part of the options as “WHAT” you want to transfer between geometries, and the second part as “HOW” you want the attributes to be transferred.
You can read the full documentation on each one of the options here.
On a daily basis, we have to keep an eye on a number of important stuff: Component IDs, UVs, Topology Changes, Spacing (world, local, etc.)
I’m gonna explain more on a couple of examples:
Case #1: Transferring UVs Between Meshes
There could be lots of scenarios, here’s the basic one plus a bit of information on other scenarios:
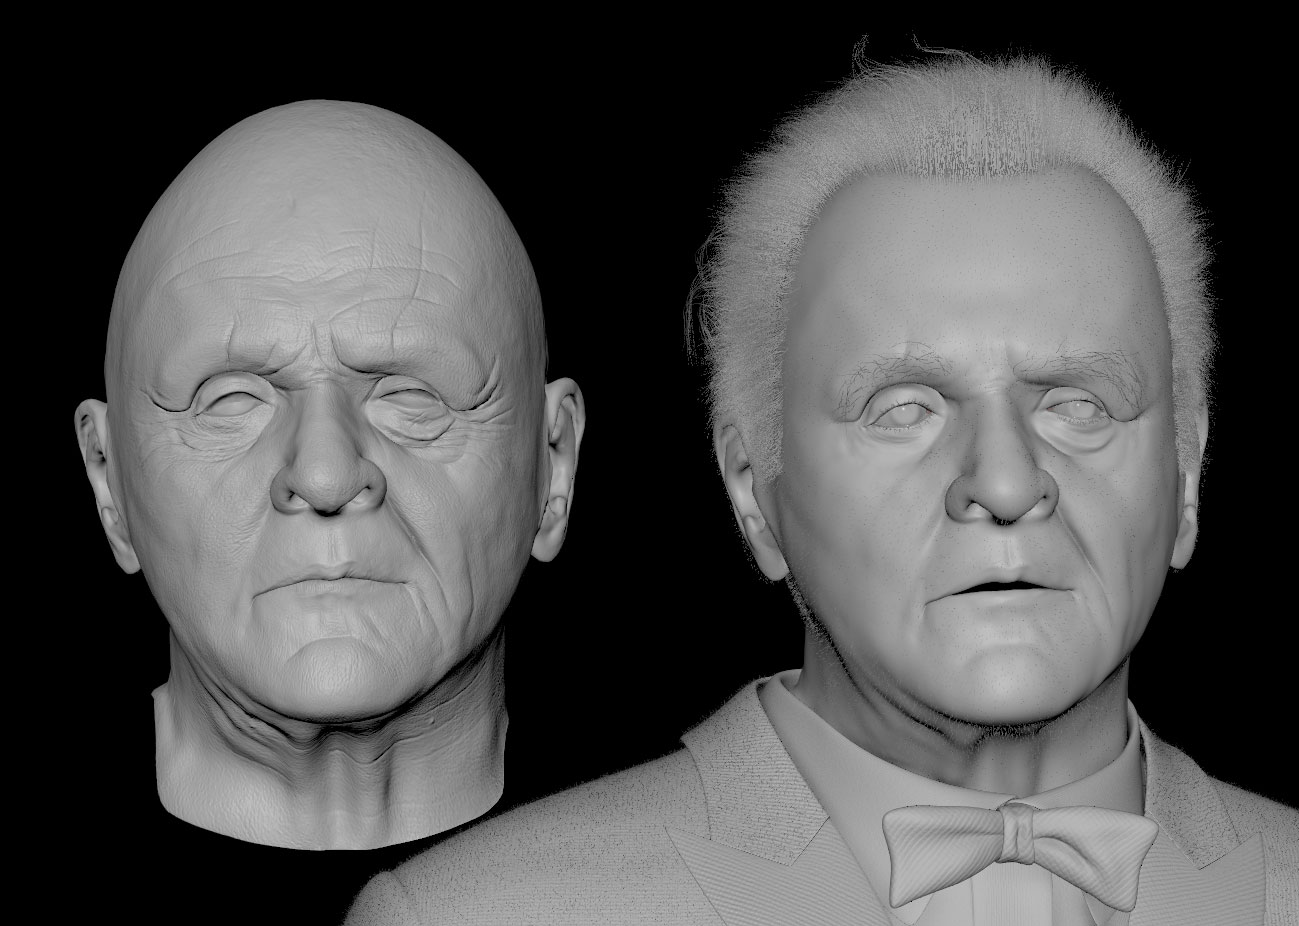
Here I have two meshes with the same topology, one with the right UVs and mouth closed, and the other, no UVs and mouth open. I want to transfer the UVs and also the shape to the other. Let’s go through some of the options we need and why.
**Vertex Position: On _**- I basically need this just because I want to make the lips closed in the new version. This option could be useful in combination with _Topology sample space when Component IDs have changed, therefore you can’t use Blendshapes.
**UV Sets: All _**- So I want to transfer everything about _UVs from the old model to the new one, right?
Sample Space: Component - This is usually the make-or-break part of this whole transferring. In this case, since I have the same topology and Component IDs, I chose component. If the Vertex IDs on models did not match each other, I’d use Topology option instead.
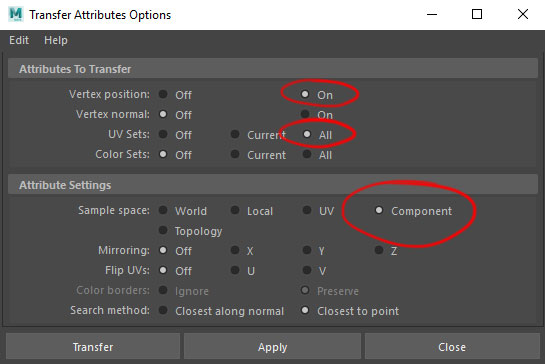 So these are the settings in this case.
Case #2: Transferring Vertex Normals
In this case, I just want to showcase an example of how we could actually put this option to good use.
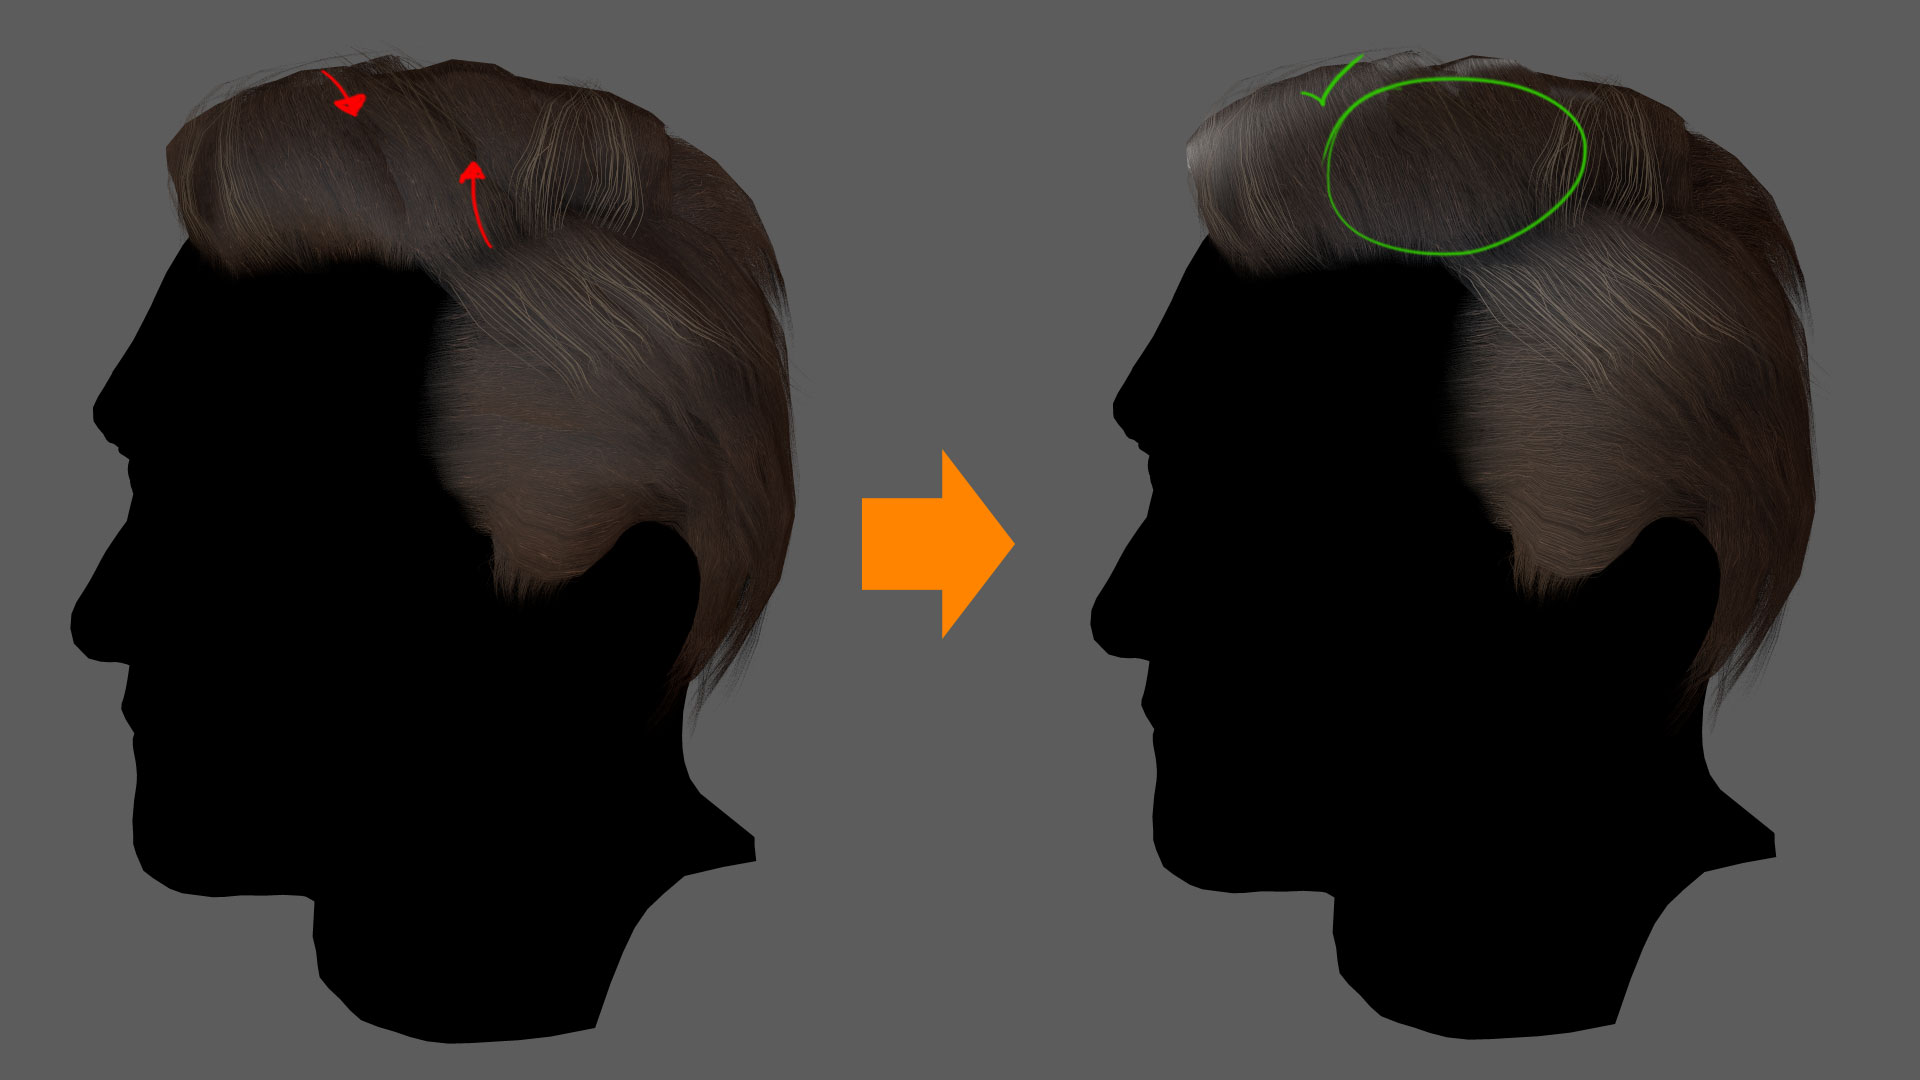
So I have a hair made of hair cards for game engines. As you create strips of polygon hair, each strip has its own normals, naturally. In order to make them seamlessly blend into each other like real hair would do, specially in terms of creating smooth highlights, we should use transfer attributes.
First of all, merge all your hair cards into one geometry (target object), if you already haven’t. Then create a somewhat cylindrical dome-alike object to nearly match the outline of the hair. Now divide the dome to have really hi-res geometry. Then freeze transforms on both source and target objects. This is important since we’re gonna use World sample space.
You should have something similar to the image below.
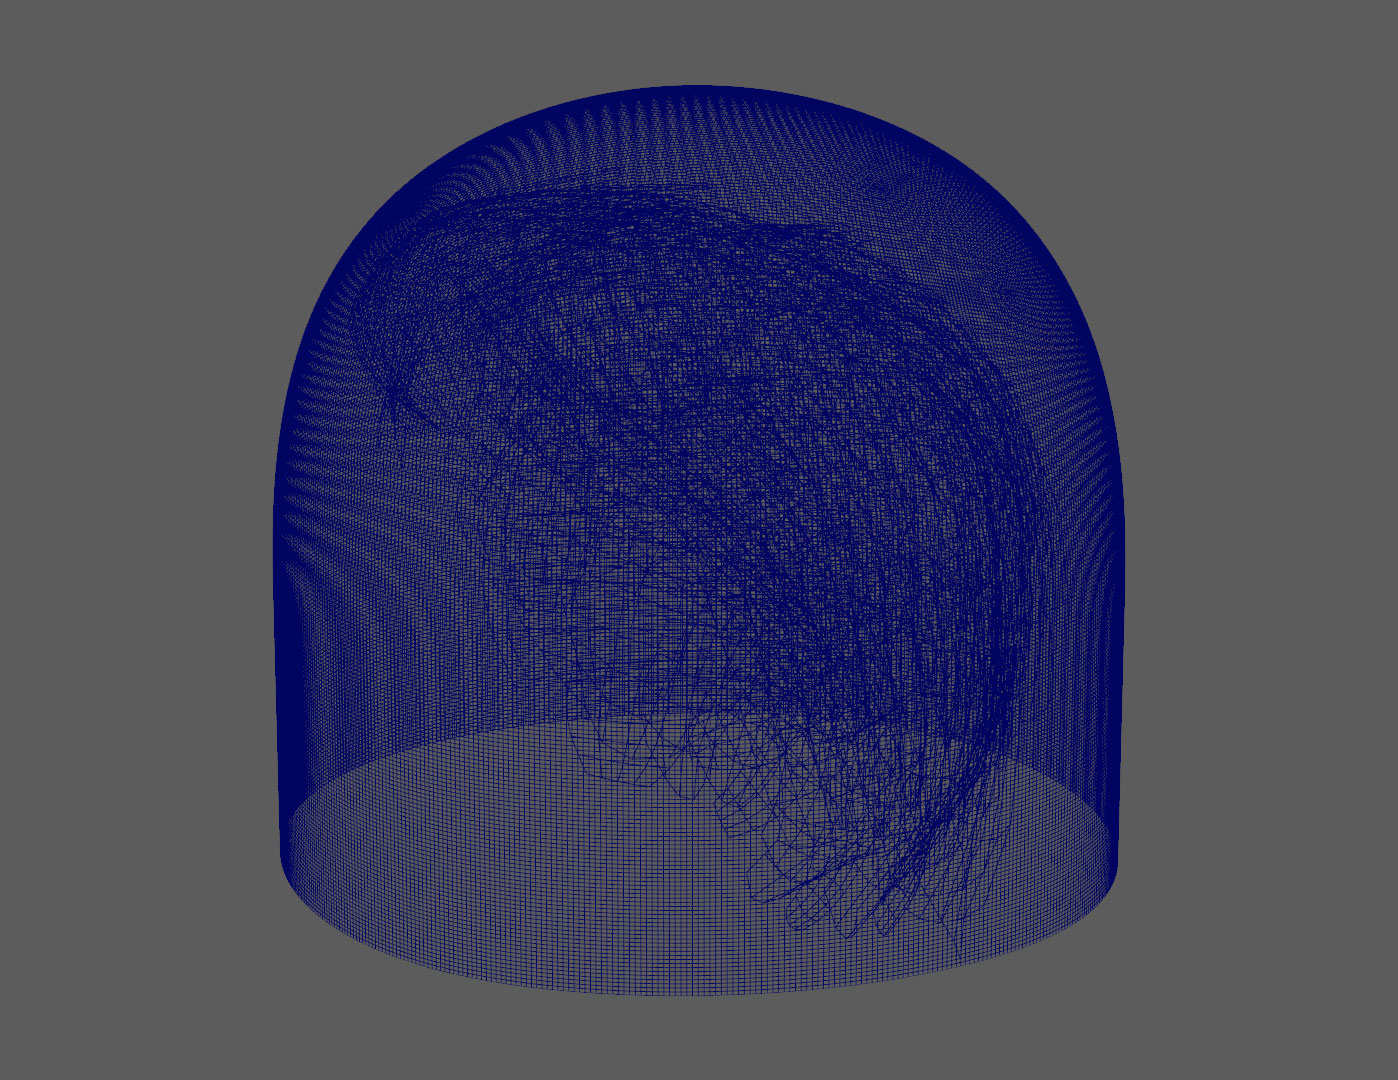 The hair geometry (target) is sitting right into the dome geometry (source).
Now, for Transfer Attributes Options:
Vertex Normals: On - This is the main data that if transferred from the shape we just created, solves all the specular and seamlessness issues I mentioned before.
Sample Space: World - By choosing this option, “sampling normals” is done by evaluation of the absolute distance between the vertices. So, good for us!
Search Method: Closest To Point - This is the default option. Just make sure you don’t have the other option (Closest Along Normal) is not activated. Because it could cause some artifacts.
 These are the settings in the second case.
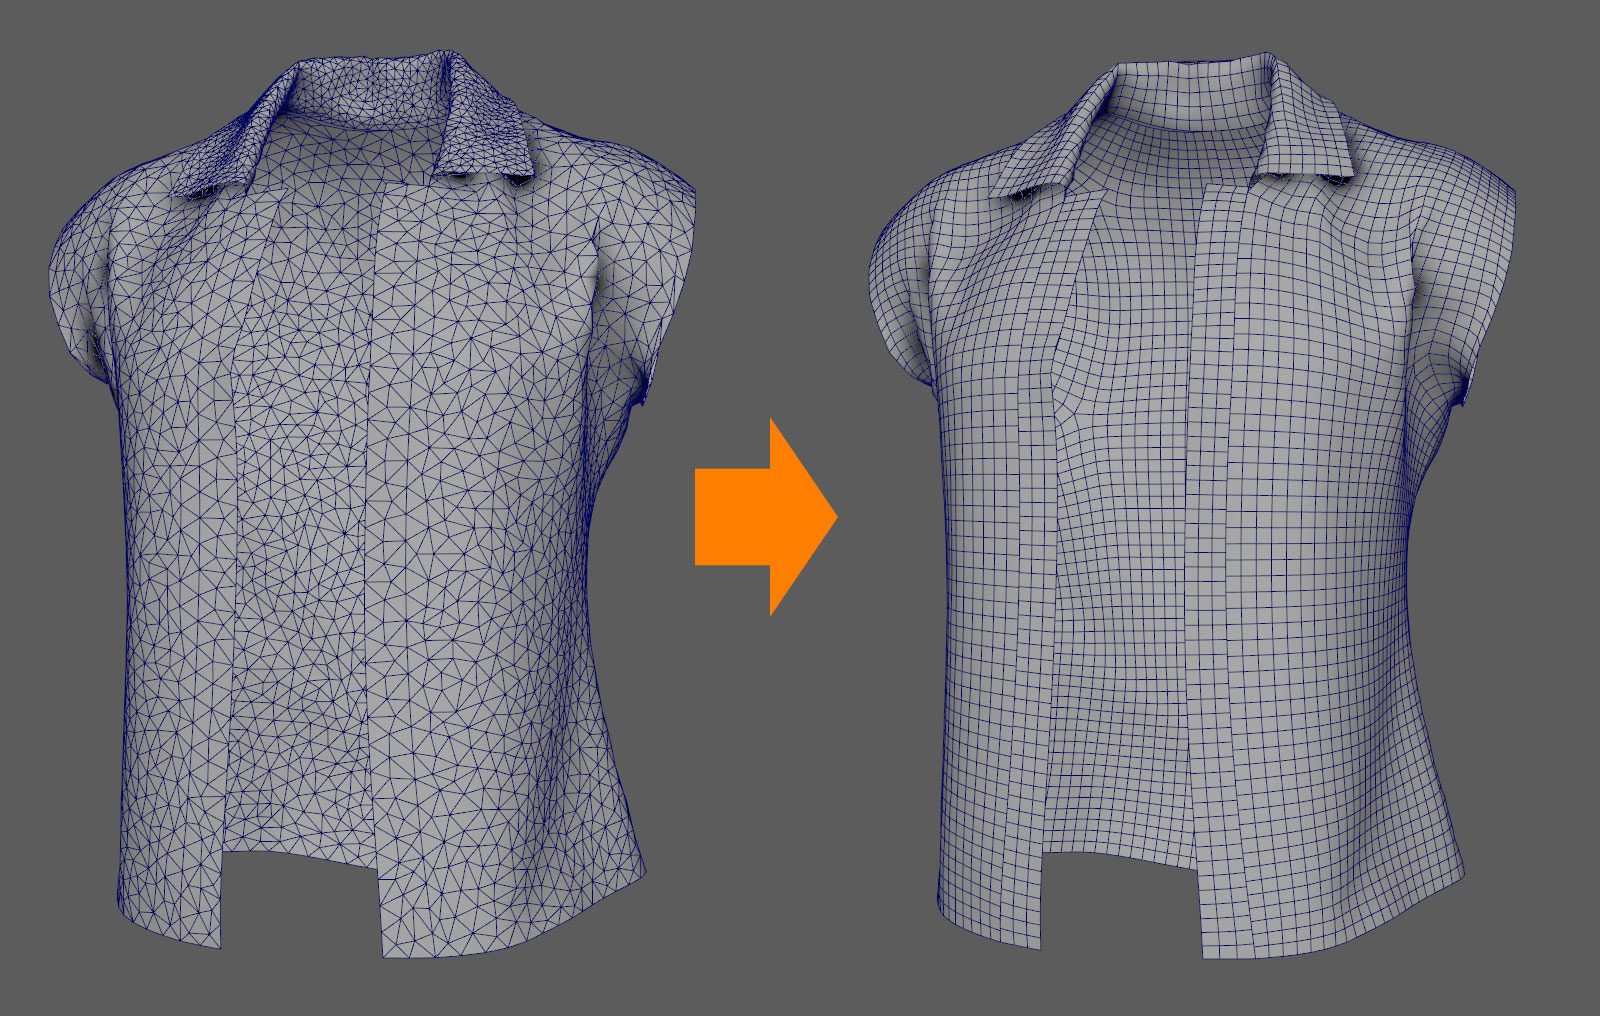
Case #3: Using Transfer Attributes In Marvelous Designer Workflow
In this case I’m gonna demonstrate a cool trick to retopologize the clothes created in Marvelous Designer for further use in the pipeline.
We’re gonna need 3 geometries and 2 usages of Transfer Attributes.
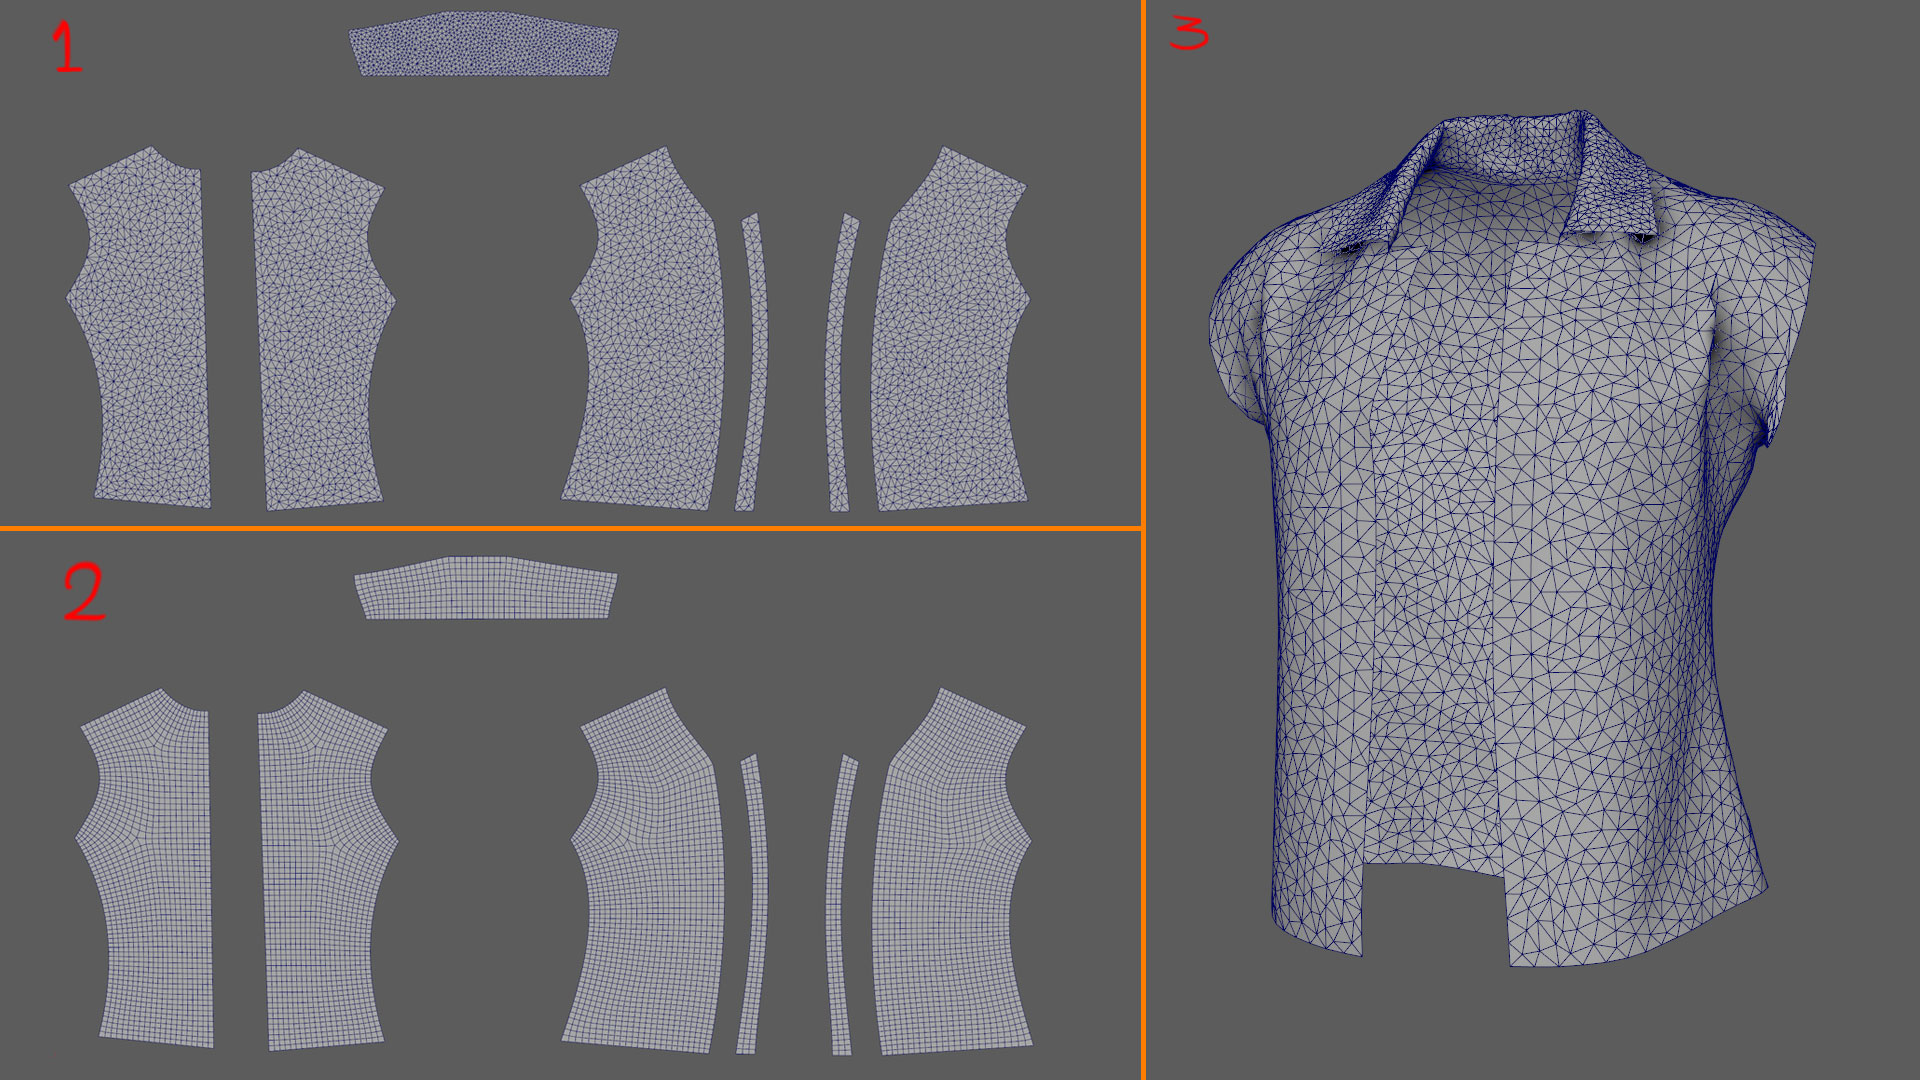 These are the models we need.
So, now what we need to do, is to transfer UVs from the triangulated flat model (1) to the quads version (2). Then, we should be able to transfer vertex positions from the triangulated model (3) to the quad flat model (2). And that’s it.
For the first “Transfer Operation,” since our models are exactly on top on each other, we need to use World Sample Space to transfer the UVs.
For the second “Transfer Operation,” since our models share the same UV sets, we could use UV Sample Space to transfer the Vertex Position.
And now you have the quad version of your clothes model with perfect UVs to use in your project.
That’s all. Thanks for reading.